25/52: Vertical Ambition photo shoot

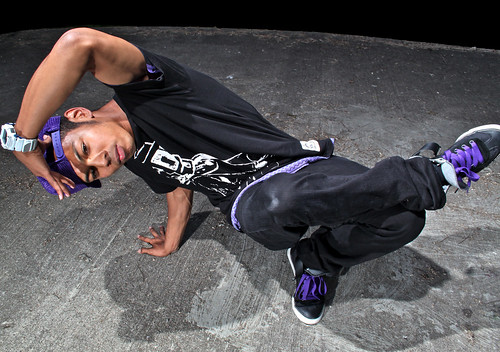
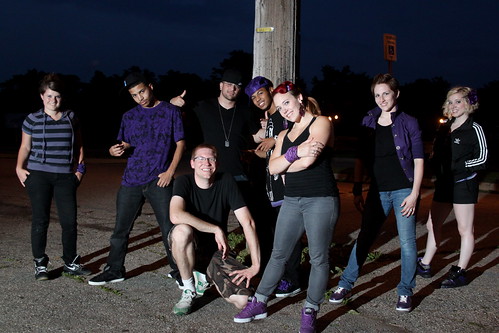
This week’s post has been sitting in WordPress as a draft for almost 6 months – that’s how long I’ve been planning this one. This week, I did a photoshoot for Vertical Ambition Dance Company, a group of extremely talented dancers who are rooted in breakdance, hip-hop, ballet, and modern.

Vertical Ambition Dance Company

See the entire set of Vertical Ambition Dance Company photos on Flickr.

I first approached Jared, one of the VADC founders, about shooting photos of the company back in December of 2009, and it finally worked out to do a shoot this Monday evening. I knew I wanted to do this for free, as a creative collaboration (for a great read about this way of working, read this Strobist article about working for free).

I was lucky to have had a great chance to watch 3 or 4 hours of the “Studio Photography with Zach Arias” workshop on Creative Live as it was re-aired on Sunday night, so I was extremely inspired going into the shoot. I’ve been a big fan of Zach’s photography for a long time, as well as the sharing and teaching he does.

Before I ever picked up the camera, I looked at Flickr months ago for inspiration. Here are a couple of shots that I dug:

Look ma, no hands
http://www.flickr.com/photos/knottyy/3056461129/
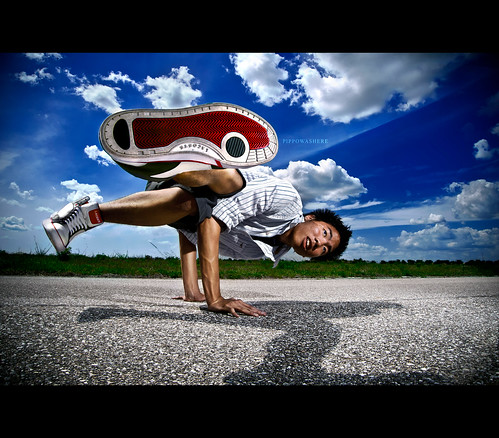
kcik it
http://www.flickr.com/photos/pippowashere/4521930600/

(PLEASE NOTE: The two photos above were NOT taken by me – they are photos from others on Flickr!).

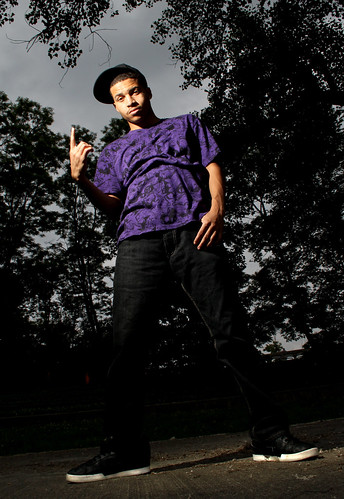
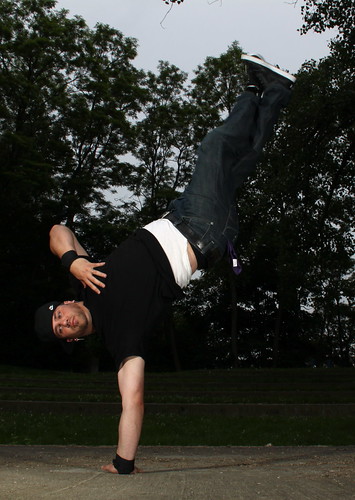
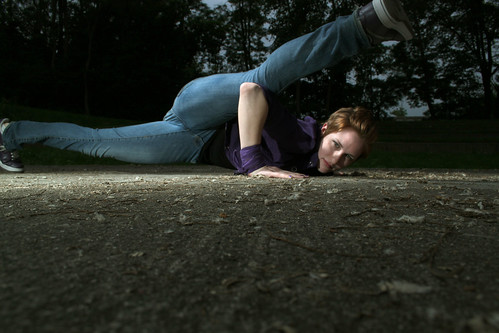
Several things I noticed right away about many of the breakdance photos were extreme wide-angle shots, dramatic poses, and lots of low and close shooting angles. I knew I wanted to nail some of these, but also wanted some nice portraits of each dancer. I decided to shoot these basic portraits first as a way to get to know each of the dancers and get some easy shots in first. Here are a few of those portraits:

Vertical Ambition Dance Company

Vertical Ambition Dance Company

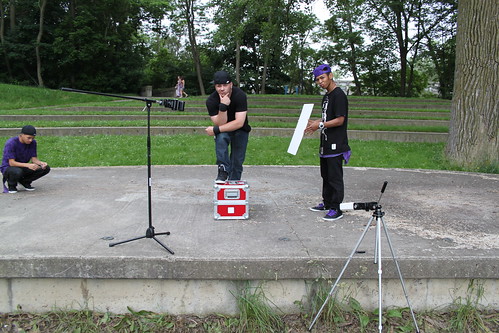
Here’s a setup shot showing the basic setup for these – one flash for the main key light, and another tightly-snooted flash to focus light directly on the box.

Vertical Ambition Dance Company

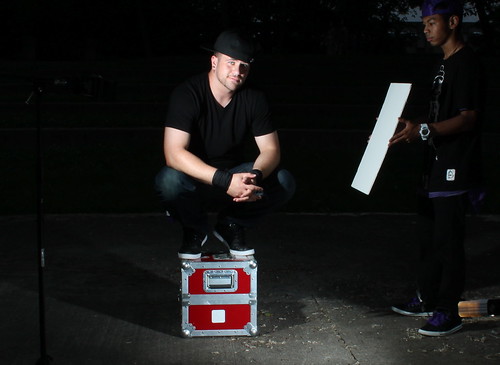
Here’s a “photo aware” shot showing both Jared (the main subject) and Shane (one of the VADC dancers who did a GREAT job of assisting me with lights & reflectors!).
Vertical Ambition Dance Company

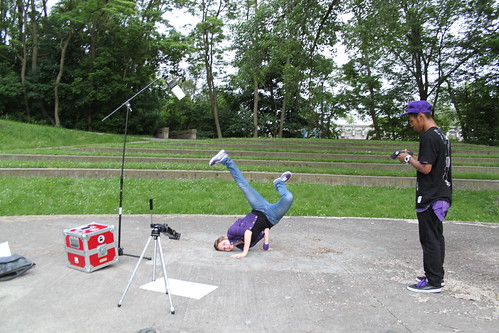
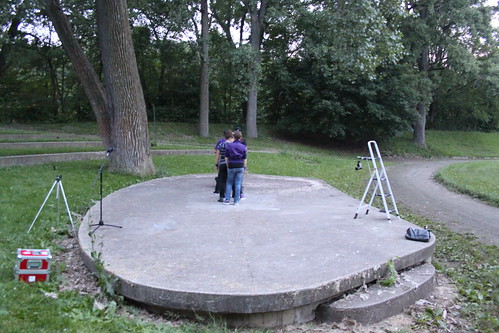
These were all taken at Frog Island park in Ypsilanti, on the concrete stage that sits on one end of the park. This was a great location – the concrete worked as a great texture, and it was a nice, level surface for the dancers. The mosquitoes were a bit of a pain (summer nights!) and we all sweated a bunch, but it was worth it in the end.

Here’s another setup, showing how we were using the location, and a few of the resulting shots:

Vertical Ambition Dance Company

Vertical Ambition Dance Company

Vertical Ambition Dance Company

Vertical Ambition Dance Company

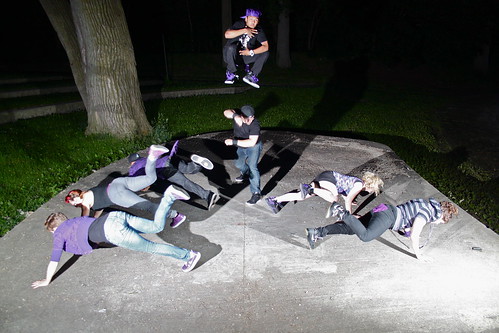
The final big shot of the night was a group shot where most of the crew dove to the side while Jared launched Shane up into the air. I never ended up with a shot I completely liked, but it turned out well enough.

Here’s the setup:

Vertical Ambition Dance Company

And the result:

Vertical Ambition Dance Company

After we’d packed up and headed back to the parking lot to leave, I remembered that I wanted to get a quick photo of me with the crew, so I set a single flash down on my minivan’s roof, popped the camera on the tripod, and jumped in the frame.

Vertical Ambition Dance Company

Overall, I had a fantastic time on this shoot – it’s maybe the most fun I’ve ever had taking photos. The main reason I’m going these photoshoots is to improve my skills (along with having fun!). I believe a big part of getting better is reflecting on what worked and what needs to change.

Here are the things I felt I did well:

  • I brought almost all the gear I’d need (stands, clamps, ladder). A
    second mic stand adapter would have been good (so I could use my mic stands for the flashes instead of having to use a tripod for one of them). For this shoot, a pushbroom would have also been helpful (lots of debris on the concrete stage).

  • I had a vision/plan and executed it well.
  • I engaged with the crew well – I gave pretty good directions, had a
    series of shots in mind & got all of them that I wanted to.
  • I remembered to get setup shots and a self-portrait with the crew at the end.
  • I shot good angles and compositions

Here are some things I’d change:

  • I’d shoot in RAW instead of shooting JPGs – since I have to wait for my flashes to recharge anyway, the slight extra time required for shooting RAW files would be well worth it. There were times during the post-processing that I wish I’d had the flexibility that a RAW file can provide.
  • I need to pay more attention to the histogram and LCD for fine-tuning exposure,
    especially in body details. There were some shots where the highlights were too hot, and some where there was too much shadow.
  • I’ll always bring extra batteries from here out – I had a flash die part-way through due to dead batteries and was reduced from 3 flashes to only 2.
  • I’m going to try shooting tethered to my laptop for my next session. It might not have worked well on this shoot (lots of movement around an outdoor set) but I’d like to give it a try.
  • I need to remember that light temperature/color is controllable via gels on the flashes – I got too caught up in light placement/exposure and forgot about color temperature.
  • I need to build a pair of DIY variable power controls for my Vivitar 283s in order to get more flexibility out of them. Luckily, there are easy-to-follow plans available (look for these as a future 52 things project!).

See the entire set of Vertical Ambition Dance Company photos on Flickr.
24/52: Church Music Rig

This week’s post is a look inside my music rig for my church. I spent some time this week getting things set up the way I want in order to expand my musical capabilities, so I thought I’d document and share it here for this week’s project.

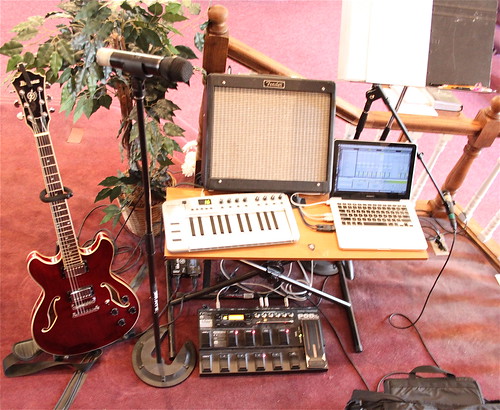
Here’s the overall rig, once it’s assembled:

church music rig overview

My main role is as a guitarist, the main focus of this rig is playing guitar. You can see my guitar on the left – it’s an Ibanez Artcore A73 semi-hollowbody. It plugs into a Line6 PodXT Live, which in turn runs to a Fender Blues Junior amp. Both the PodXT and the Fender belong to the church, and stay there & are plugged in at all times, so setup is easy – plug in my guitar, turn things on, and I’m ready to play. A mic stand & wireless Shure mic are also set up full-time, since I sing as much as I can (sometimes I’m too busy strictly playing guitar!).

In addition to playing guitar, however, I’m also starting to slowly bring some electronic elements into the mix. As a solo musician, I typically play strictly instrumental electronic music, and finding an appropriate and musically valid way to integrate that part of my music into what I do at church has been a long, slow process. I feel like I’m finally making some progress, however!

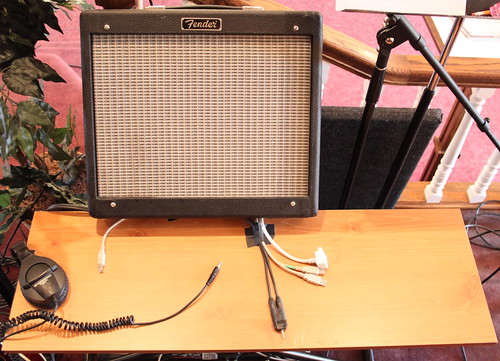
On with the rig! As you can see, there’s a shelf under the amp that’s gaff-taped to a keyboard stand, to form a wide, shallow table.

amp, laptop table with cables

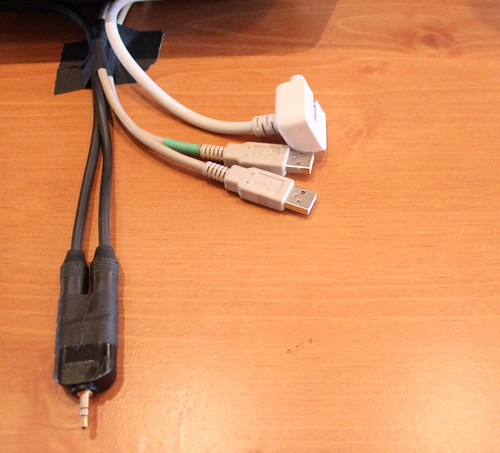
Here’s a closeup. 2 USB cables and an Apple power cord also stay gaff-taped to the shelf, along with a custom audio cable I made up. It’s a 1/8″ stereo miniplug on one end, and stereo 1/4 plugs on the other end. The 1/8″ stereo end plugs into my MacBook Pro’s audio output, and the other plugs into 2 separate DI boxes that run into our sound system. One of the USB cables runs to the left-side of the shelf, and is used to connect an M-Audio KeyRig keyboard (a small, lightweight 25-key USB keyboard controller). The other USB cable runs into the PodXT Live, so it can be used as an audio input into Ableton Live.

cables (detail)

Having all this set up permanently means that setup is extremely fast. I pop the KeyRig out of my bag, plug it into its USB cable, set my laptop on the shelf, plug in 2 USB cables & the audio cable, then connect my power supply to the cord. Done!

The bottom of the rig is a little messy. On the top left, you can see two separate DI boxes, which run my laptop’s signal to two separate channels on the mixing board. You can also see the way the PodXT Live fits into the space of the keyboard stand. This is important because it helps my rig take up a smaller amount of space, and keeps everything together nicely. We don’t have a lot of room on the platform (lots of musicians plus choir) so every inch counts!

Floor view: DI boxes, PodXT Live, cables

Now that I have my 1/8″ to stereo 1/4″ cables, I’m able to split the stereo audio output from my laptop into 2 discrete channels. The left channel strictly carries a click track (metronome), while the right channel carries everything else, which might be loops, programmed drums, electric piano sounds, or whatever I choose to play from my laptop.

Here’s a look at my screen setup in Ableton Live:

Ableton Live setup - church music rig

As you can see, the rhodes electric piano channel (which is currently selected) is panned hard-right so it shows up separate from the click track. The advantage of this is that the click track can then be sent to the rest of the band’s monitors (via a send on the mixing board) without going to the main sound system, while anything else from the laptop gets sent separately.

I’m really looking forward to getting a chance to use this rig over the next weeks and months. The ability to drop in programmed elements, live electronics, and use a click track to lock in tempo will be a dynamic new element to our church’s worship music.

23/52: Running Photos

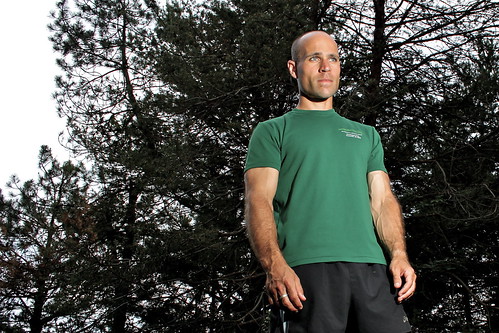
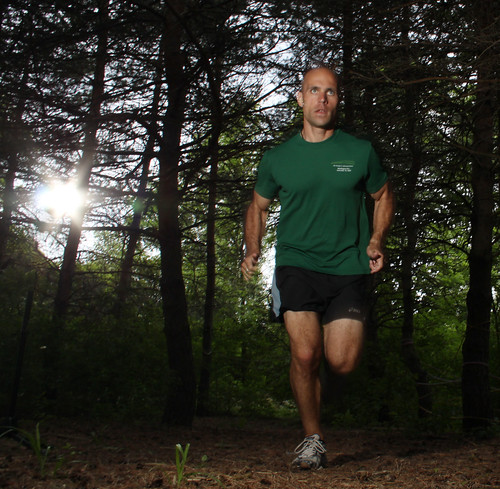
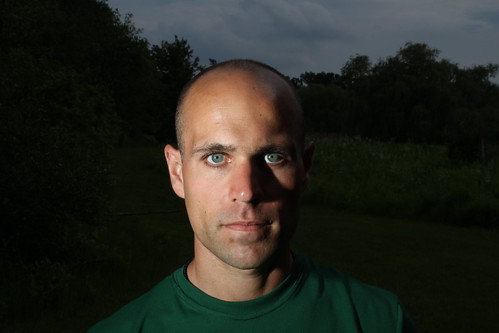
This week’s post was a first for me. I’ve been slowly working on improving and expanding my photography knowledge and skills, and this was the first time I’ve asked someone to specifically model for me. My friend and co-worker Cam, an amazing teacher and runner, agreed to be my subject for this shoot.

Running

For this shoot, I took a basic lighting case, containing 3 flashes and my radio trigger system, plus a couple of odds and ends (a roll of gaff tape, a clamp, my DIY softbox, etc).

Lighting Case

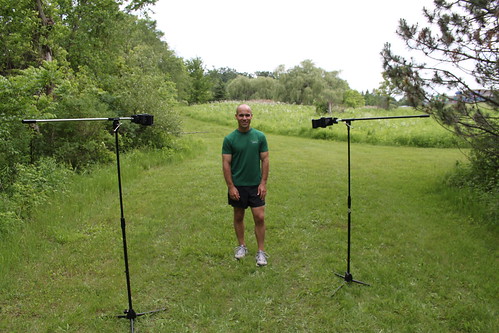
Along with the lighting case, I also took a couple of my mic stands. I made converters for them to allow me to use them as tripods/light stands (see my DIY photo gear post), and they work great for situations like this since they have a boom arm.

Mic stands with DIY 1/4x20 studs

Since Cam is a runner and nature enthusiast, I wanted to put him in a setting that would reflect that. Here’s the setup for one of the looks (a portrait with the woods & sky in the background). I ended up using one Vivitar 285 flash, and one Vivitar 283 flash for these. I experimented with using a softbox on the 283 at times, but left the 285 as a bare flash.

Running

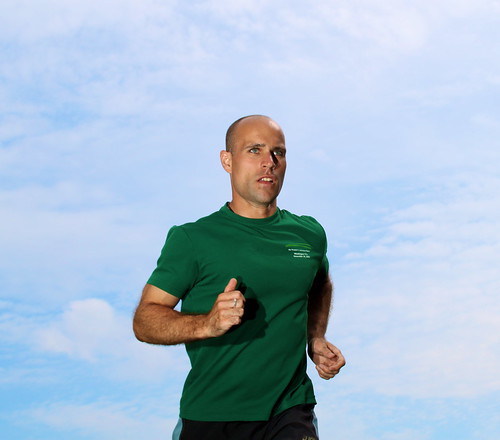
Here are a few of the resulting shots:

Running

On the run: Cam

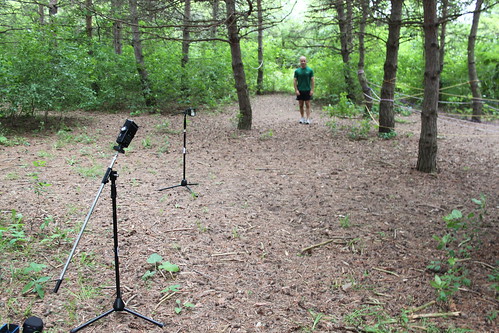
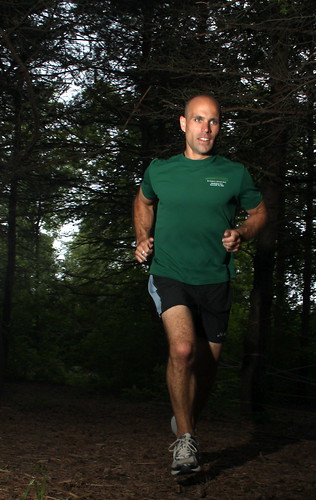
We also went into the woods for a different feel. Here’s one setup, designed to capture Cam mid-stride in the woods.

Running

The finished product:

Running in the woods: Cam

Running

View the full set of Cam’s running photos on Flickr.
22/52: Macro Lens & Photos

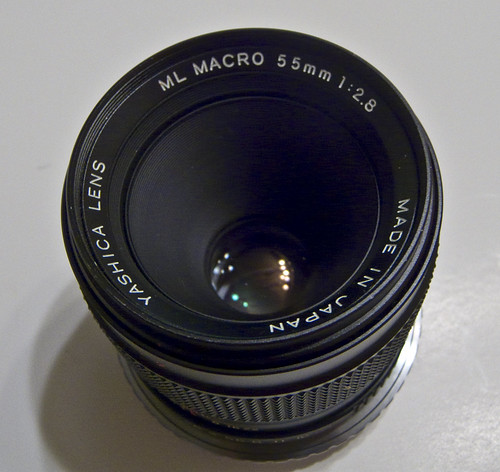
This week’s project didn’t quite turn out the way I had hoped, and it’s a bit late being posted, but here it is: a set of macro photos from a friend’s Yashica 55mm Macro ML lens.

C/Y mount Yashica 55mm Macro ML

I bought an adapter ring to go from C/Y (Contax/Yashica) to EOS (Canon’s modern lens mount), which allowed me to mount this manual focus lens on my Canon T1i. Here’s a picture of the rear of the lens with the adapter ring.

C/Y mount Yashica 55mm with C/Y to EOS adapter ring

When I first started investigating the possibility of mounting manual lenses, I started out reading the EOS Cameras and Manual Lenses group’s discussions on Flickr. One recurring issue with using manual-focus lenses was ensuring that the image is in focus, which a modern auto-focus lens does automatically. Using an adapter ring with an auto-focus confirm chip allows the camera to communicate with the lens and provide confirmation that it’s in focus.

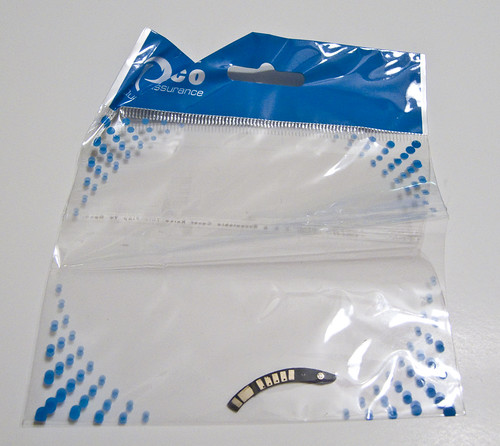
Therefore, the first thing I’d bought was an auto-focus confirm chip, purchased from an eBay seller in Hong Kong. I mis-read the chip’s description, thinking it was an adapter ring WITH an auto-focus confirm chip, when instead it was JUST the chip itself.

C/Y to EOS adapter chip

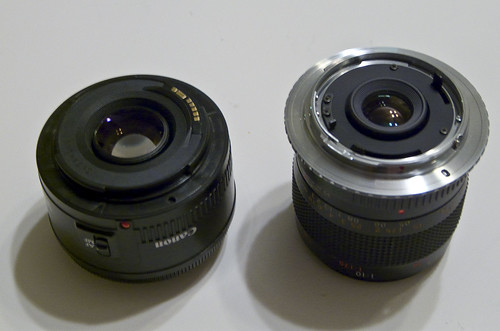
After that, I bought a simple C/Y to EOS adapter ring, after being assured that it would be a simple thing to mount my mistakenly-bought chip on this ring. Turns out, it’s not so simple. Here’s a comparison of my 50mm Canon lens (left) and the 55mm Yashica lens:

50mm / 55mm comparison

As far as I can tell, the AF confirm chip would need to be mounted at a spot on the Yashica lens where the shutter trip lever sticks out. Initial attempts to place the chip were unsuccessful, so I decided to shelve the idea and try using the lens with manual focus instead.

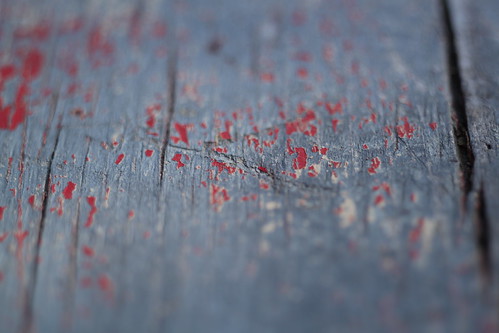
Here are a couple of photos of a wooden bench. The lens was set to f/2.8 (the largest aperture available), and you can see the shallow depth of field that’s possible, especially on the second shot.

Yachica 55mm Macro ML: bench (1)

Yachica 55mm Macro ML: bench (2)

However, it’s quite easy to take shots that are almost in focus, but not quite. These two both looked good through the viewfinder, but upon review are not quite tack-sharp.

Yachica 55mm Macro ML: bad focus

Yachica 55mm Macro ML

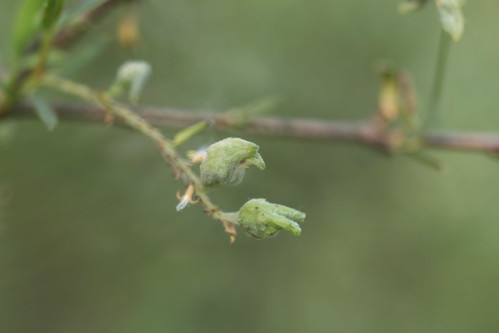
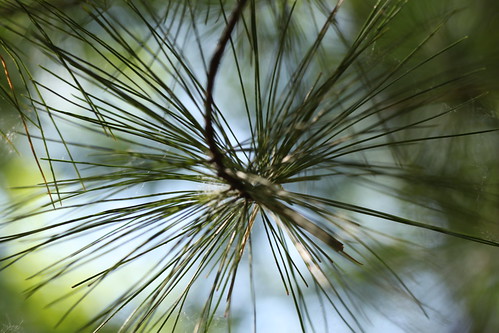
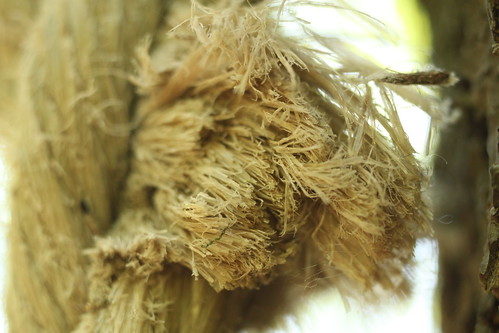
I did end up with a few shots I liked a lot, after much trial and error. It turns out the Canon’s auto-metering is about 2 stops off, making me dial in a -2 stop exposure when using Program mode. I shot mostly on Manual after a while, doing critical metering and shutter adjustments on the fly and checking the results on the camera’s LCD screen.

Yachica 55mm Macro ML: pine needles

Yachica 55mm Macro ML: rope

All in all, a good learning experience, even though things didn’t turn out quite as expected.

21/52: Ann Arbor-Rochester travelogue, part 2

In Part 1 of my Ann Arbor-Rochester travelogue, I described my trip last weekend to Rochester, NY, for the 2010 Technology of Applied Photography and Imaging workshop. This is the second of two parts, describing my experience there.

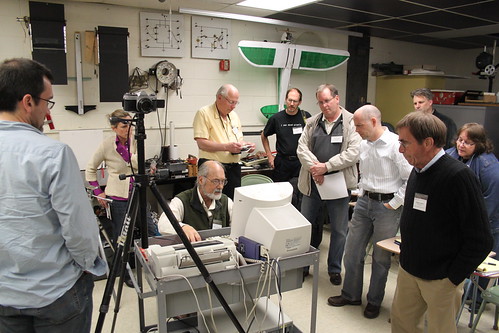
Day 2 of the workshop was Saturday, and it started off with Andrew Davidhazy talking about high-speed photography. Here’s a shot of him looking a bit mad-scientist as he sets up one of the shots:

IMG_4530

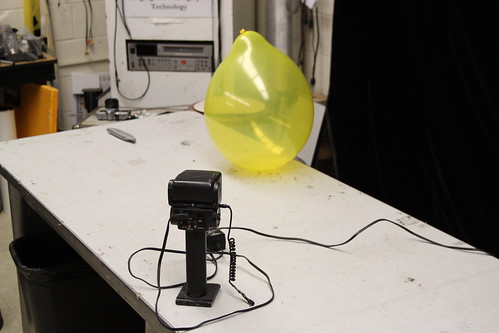
Andrew is known for his high-speed photography work. In the shots below, he showed us how he accomplishes some of the shots he’s famous for. The balloon-pop photo was done with an external flash, set to its lowest power (and thus its shortest flash duration) in a completely dark room. The flash gets triggered by a microphone, which sends out a trigger voltage when the balloon loudly pops.
IMG_4557

I snagged this shot on the first balloon pop attempt!

IMG_4558

In the afternoon, we were treated to a 90-minute tour-de-force of color theory with Glenn Miller.

IMG_4578

Finally, Saturday’s sessions concluded with Andrew Davidhazy talking about and demonstrating strip camera photography. He modified a Canon AE-1 film camera with the imaging electronics from a small scanner, and created a camera that takes strip photos, also called roll-out photos. Here’s the apparatus:

IMG_4597

Here’s a photo Andrew took of me with his DIY strip camera. To make this work, I had to stand on a heavy-duty turntable and slowly rotate, as the camera scanned one line at a time.

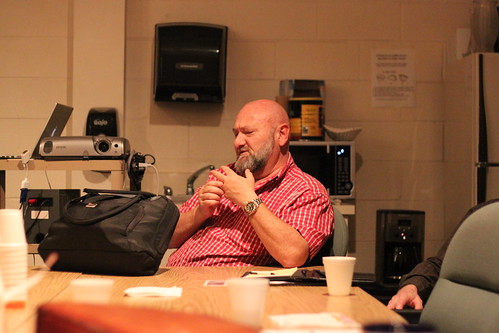
Day 3 was Sunday, and it started with a wrap-up session. Here’s Herschel Mair, an incredibly knowledgeable and talented photographer who is currently based in Oman:

RIT, Day 3

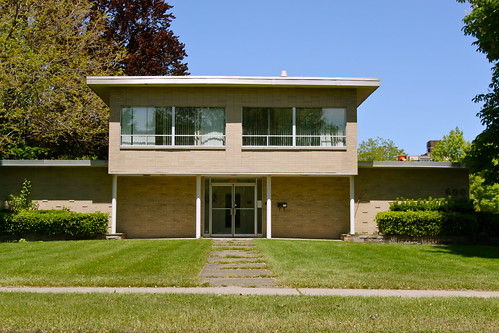
After our wrapup session and lunch, we headed into downtown Rochester to visit the George Eastman House, home of George Eastman, who founded Eastman Kodak. Here’s a view along East Avenue, the street that the museum is on:

RIT, Day 3

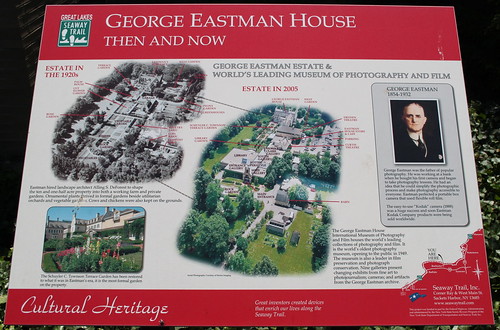
George Eastman House plaque:

RIT, Day 3

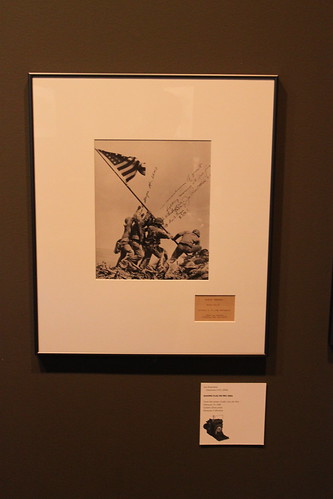
One of the first exhibits in the museum was an overview of historically significant photos and photography equipment. One that struck me was the photo of the flag-raising on Iwo Jima during World War II. I’ve been reading a lot of WWII history over the last few years, so this was especially meaningful.

RIT, Day 3

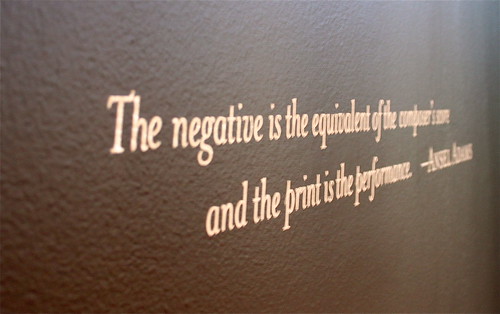
One of the exhibits I enjoyed the most was “Persistent Shadow”, a showing of photographic negatives through the history of photography. This quote by Ansel Adams sums it up: ” The negative is the equivalent of the composer’s score and the print is the performance”.

RIT, Day 3

It was an interesting experience being immersed in so much film-based photography this weekend, and this exhibit certainly fed into that. I’ve shot strictly digital for so long that the idea of shooting film is almost foreign to me (though I do have a few film-based projects in the concept stage for upcoming 52 things projects).

After the museum, it was time to hit the road again.

RIT, Day 3

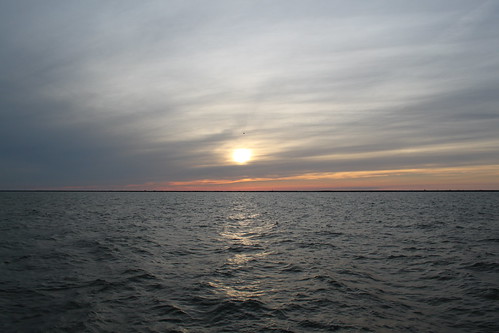
I stopped in Cleveland long enough to snap a few shots of a lovely sunset over Lake Ontario (and gloat about the recent Boston Celtics win over the Cleveland Cavaliers).

RIT, Day 3

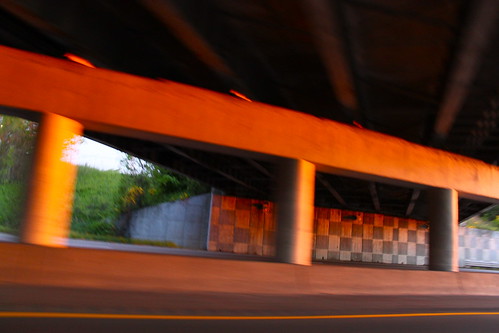
As the sun slowly sunk below the clouds and hills, a beautiful orange light shone across the highway, and I couldn’t resist snapping a few shots as I sped toward home…

RIT, Day 3

20/52: Ann Arbor-Rochester travelogue, part 1

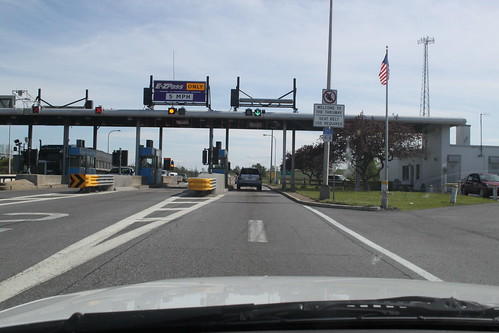
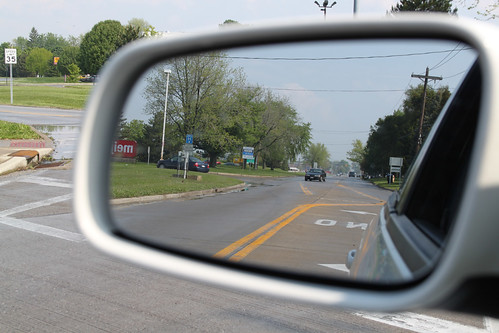
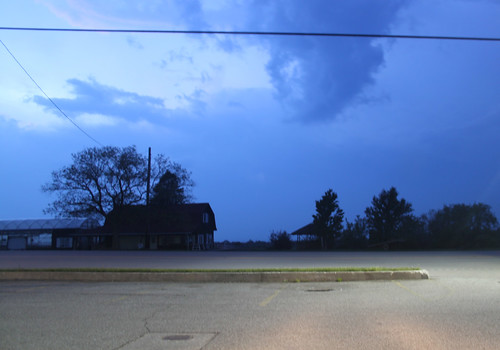
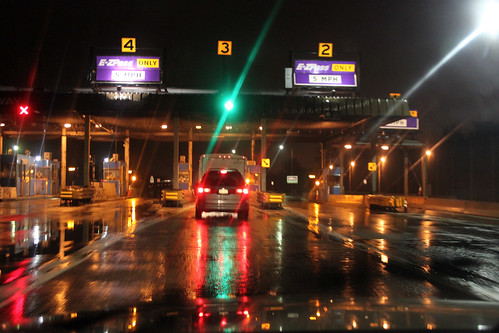
This weekend, I went to Rochester, New York, to attend the 2010 Technology of Applied Photography and Imaging workshop. I drove out on Thursday afternoon, heading from Michigan down through Ohio, then on into Pennsylvania and finally into New York.

Here are a few photos from the trip:

IMG_4382

IMG_4388

IMG_4398

IMG_4408

You can see the full set of travel photos at Flickr.
On Friday morning, the workshop began with an introduction and initial session by Andrew Davidhazy. His session focused on using photography as an unconventional measurement tool.

Andrew Davidhazy opening session

IMG_4457

Afternoon sessions discussed digital workflow and macro/microphotography.

IMG_4474

IMG_4476

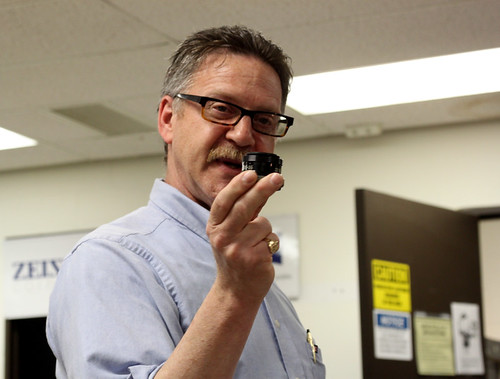
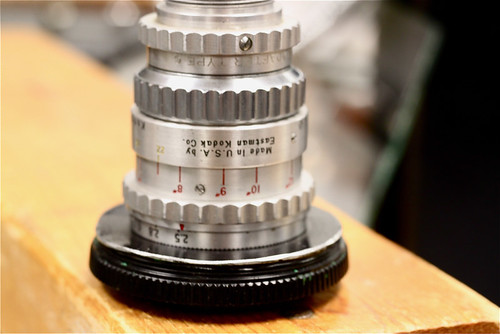
Cine mount 16mm lense epoxied to body cap
This is a cine-mount 16mm lens epoxied to the body cap for a low-cost micro photography lens.

You can see the full set of Day 1 workshop photos at Flickr.
19/52: Gibson SG Junior photos

This week’s post is late, for several reasons. I did the majority of the work on Wednesday night, shooting photos for this week’s project, but fell asleep while trying to edit them on Thursday and Friday nights. After finishing up the edits Saturday morning, our house’s power went out due to a storm! However, this week’s project is finally posted: it’s a set of photos of a Gibson SJ Junior guitar.
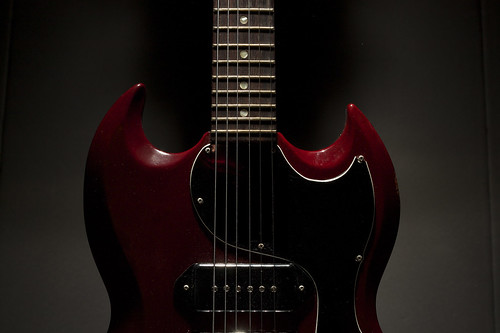
Gibson SG Junior

Gibson SG Junior

I shot these photos for several reasons. The guitar in the pictures above is owned by my father, who’s had it for over 40 years. It is a beautiful vintage guitar, and is actually what I learned to play guitar on when I was in college! However, my father has decided it’s time to part with it, to help fund the purchase of a different guitar, so I agreed to sell it for him.

Along with taking the standard eBay photos, I figured I’d take a few more interesting photos. The two at the top are my favorites.

I had taken a few photos of my guitar a while back, and really liked how this one came out:

ibanez a73 semi-hollowbody electric

This was my basic template for the first SG shot at the top of the post. It’s a single flash, pointed straight down at the guitar from above, and no real direct light from the front. I

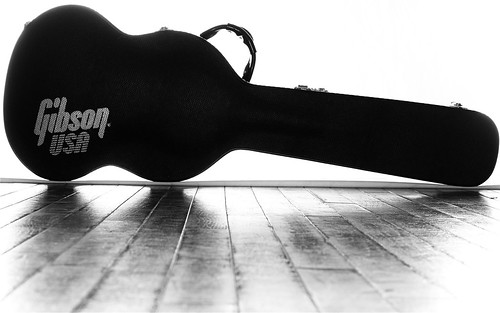
I also really liked this shot, of the guitar in its case. This was done with a bedsheet gaff-taped to the wall, and the guitar case positioned right at the front of the sheet. The hardwood floor in front of it gets some reflection – I wasn’t entirely happy with how much light hit the floor, but it turned out OK.

Gibson SG Junior

I’m now getting ready to sell the guitar, but it was a lot of fun taking pictures of it before it goes out the door. You can see the full set of photos here:

http://www.flickr.com/photos/chromedecay/sets/72157623904771755/

All photos were shot with a Canon T1i with 50mm f/1.8 lens. Flashes used were a Vivitar 285 and a Sunpak 322.

Along the way, I learned a bit more about my workflow with the Canon T1i. I’ve had this camera for about 2 months now, but have not really shot much RAW footage with it – I’m usually shooting strictly JPG. This was a nice chance to shoot RAW+JPG in a controlled environment, and figure out the necessary steps for using the CR2 RAW files the T1i produces. However, Photoshop CS3 will not read .cr2 files, so I have to figure out what my options are there – possibly a newer version of the DNG Converter from Adobe, or I may need to start using Canon’s RAW software. I ended up doing all my work on the JPG versions of these photos.

17/52: DIY Vivitar to 2.5mm Sync Cable for CTR-301p

This week’s post is both late (I usually post on Friday) and less complete than I’d hoped. However, here it is: a DIY Vivitar to 2.5mm sync cable for the CTR-301p flash triggers.

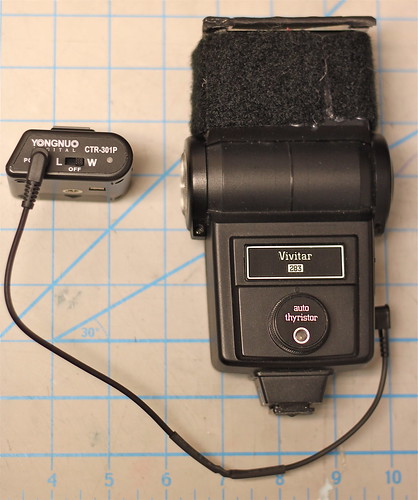
Vivitar 283 with CTR-301p trigger

I bought a new set of flash triggers several months ago, the Yongnuo CTR-301p. They are a cheap set of triggers, and they ship directly from Hong Kong, which means it takes close to a month to receive them. However, I was originally sent the wrong style of triggers – I need a Canon-specific transmitter, and I was sent a Sony/Minolta version.

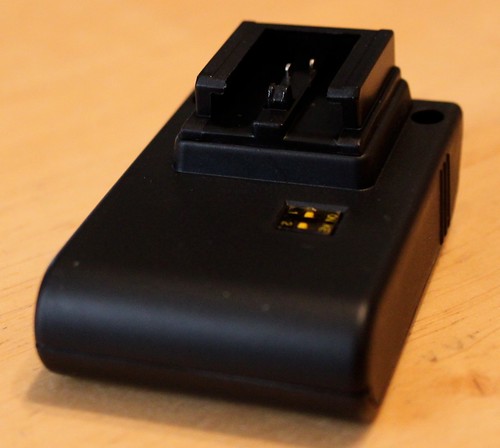
Yongnuo CTR-301P radio flash trigger: Sony/Minolta Transmitter Detail

After some haggling, I was able to re-order the correct item at a reduced price, and was hoping they would finally arrive this week in time for this 52 things post. Alas, they did not, but I was able to make some progress toward being able to use them as I intend. My main flashes are the Vivitar 285 and 283, both of which are quite old and have a high trigger voltage. I’ve heard conflicting reports about how much voltage the CTR-301p triggers are built to handle – some reports say less than 12V, and some say they’re safe up to 300V. That’s a big difference, and I’d prefer not to fry my new triggers, so I built a DIY Vivitar-to-2.5mm cable instead of using the hotshoe connection.

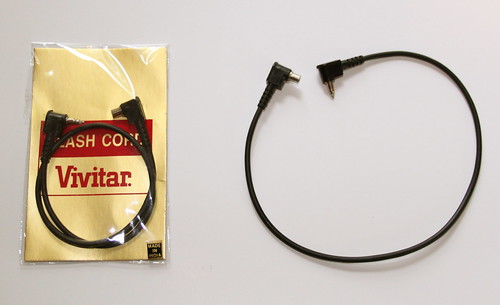
Here’s a standard Vivitar to PC sync cable. The Vivitar side is a weird, proprietary connector, which is what necessitated making a custom cable.

Vivitar to PC sync cable

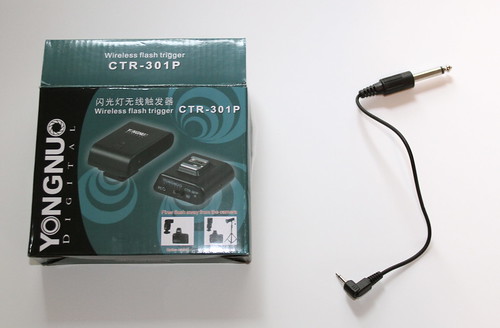
The CTR-301p comes with this cable – a short 2.5mm to 1/4″ cable, where the 2.5mm side plugs into the CTR-301p receiver.

Yongnuo CTR-301p with 2.5mm to 1/4" cable

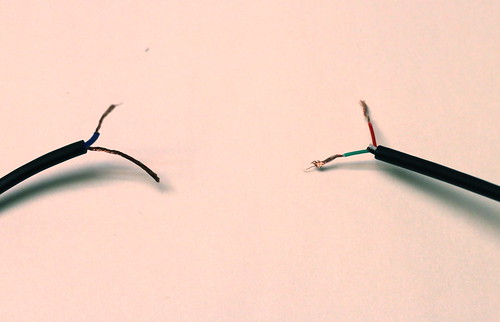
In order to make this, I basically hacked the ends I didn’t want off both cables, and soldered them both together.

DIY Vivitar to 2.5mm sync cable
DIY Vivitar to 2.5mm sync cable: solder joints

The one somewhat unusual part of making this cable is that the mono 2.5mm cable had 4 wires for some reason – usually this would only have 2 wires. I took a lucky guess that the green wire was ground, and the red wire was hot, and it worked out the first time – the green wire from the 2.5mm cable connected to the bare ground wire from the Vivitar cable, and the red wire from the 2.5mm cable connected to the blue wire from the Vivitar cable.

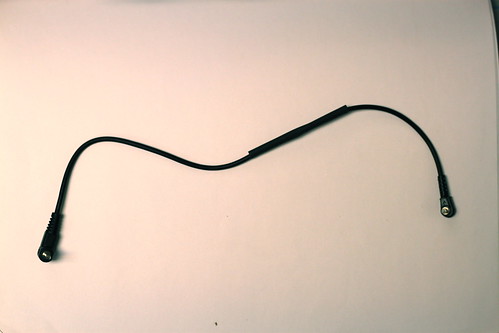
Once it was done, all that was left was to slide some heatshrink tubing over the whole thing to make it nice and tidy:

DIY Vivitar to 2.5mm sync cable

Since I don’t have the proper Canon transmitter yet, I wasn’t able to test this on the camera, but luckily the CTR-301p’s transmitter has a manual test button, and it worked properly, popping the flash every time I pushed the test button. Here’s looking forward to getting the correct version soon!

16/52: DIY Camera Jib/Crane

I was recently inspired by several things: Chase Jarvis’s “Cameras at Risk” blog entry, and a cheap DIY camera jib/crane at colvins.ca. This week’s project was building my own DIY camera jib/crane for getting interesting shots when shooting video.

DIY Camera Jib/Crane

I basically followed the same idea as the colvins.ca version mentioned above. This is very much a version 1.0 project, however, as there are a number of things that could be much improved. For one thing, the colvins.ca version uses 2″x2″ lumber, and when I picked up lumber for this project, I got 2″x4″ lumber. That makes the crane arm twice as heavy as it could be, although maybe it resists deflection (bending) more, too. There are other future improvements I’ll mention along the way.

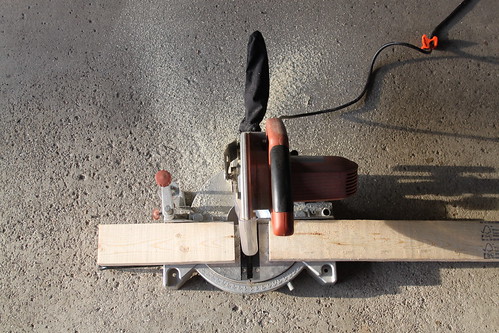
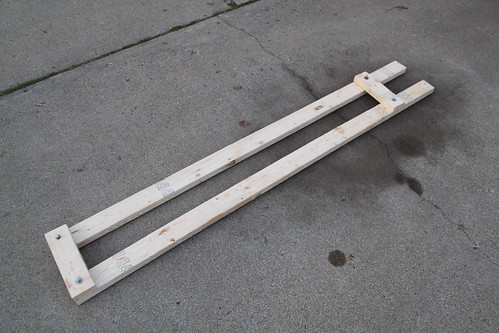
To start with this project, I measured out the 2x4s and cut off a 14″ section from each one, so the crane arm is just under 7 feet long. Then I drilled holes in the long sections, to allow the whole arm assembly to be bolted together.

DIY Camera Jib/Crane

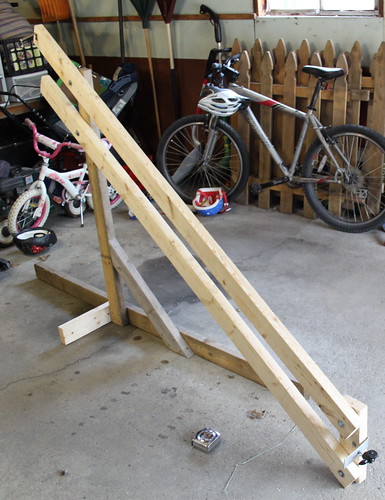
After I had assembled the crane arm (using a small piece on the end to hold the whole thing together temporarily), I built a quick-and-easy stand. The colvins.ca article mentioned using a work light stand (which I have!) but it wasn’t working for me – the stand wasn’t sturdy enough, and I didn’t feel like fabricating the necessary bracket, so I just built a version using 2×4 lumber.

DIY Camera Jib/Crane

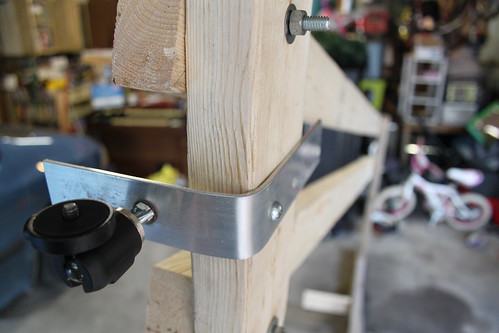
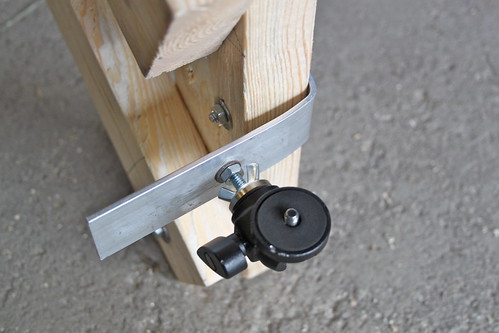
For the end where the camera attaches, I used a piece of flat aluminum stock, bent at a 90-degree angle and bolted to the end of the crane arm. A standard 1/4 x 20 bolt comes through the end, and a Manfrotto Micro Ball head attaches to that to give the camera a forward-looking orientation.

DIY Camera Jib/Crane

I didn’t get much of a chance to shoot test footage yet, as I only finished it late this afternoon, but I did get a couple of quick shots before I had to put it away. You can see the test footage here:

Things that could be much improved:

  • The stand is pretty wobbly – the vertical 2×4 is somewhat warped, and it only has ground support on one side.
  • It would be great to make the whole thing much more portable. I’m thinking of something perhaps made from PVC pipe or something similar that could be quickly assembled, but broken down into smaller pieces for transportation (4-foot long sections at maximum would make this much easier to take other places).
  • The bracket that the camera attaches to is pretty bare-bones; it’s not that stable, and it would be nice if the bolt that the ballhead and camera attach to was vertically oriented.
  • There’s no way to see the camera’s output, so a small video monitor would be a good addition
  • Long-term, I’d like to use pan/tilt brackets and servomotors to make the camera remotely controllable!

For now, I’m quite pleased with this version 1.0 jib/crane, and I’m looking forward to shooting some more interesting video with it.