7/52: Bill Van Loo remix of Joshua Schnable’s “1970 Sumeria”

Earlier this week, chromedecay artist Joshua Schnable created a new track, and he gave me access to the stems in order to remix it.

Bill Van Loo remixing Joshua Schnable's "1970 Sumeria"

Here’s Joshua’s original “1970 Sumeria”, on SoundCloud:

1970 sumeria by jschnable

I got the stems downloaded and started work on my remix, using a very minimal setup – just the laptop running Ableton Live 7, my M-Audio Trigger Finger, and my headphones. This allowed me to start work in my wife’s art studio-slash-home office while she was doing other things.

Bill Van Loo remixing Joshua Schnable's "1970 Sumeria"

Here’s a screenshot of Ableton Live partway through work on the remix:

Ableton Live screenshot of Bill Van Loo remix of Joshua Schnable's "1970 Sumeria"

I finished the remix in the actual chromedecay studio today, and now it’s available for you to listen to via SoundCloud:

1970 Sumeria (Bill Van Loo’s ambient JPL remix) by billvanloo

6/52: smoke photos + new DIY collapsible softbox

This week, I worked on two photography projects for 52 things: smoke photos, and a new DIY softbox for one of my flashes.

Part 1: smoke photos

smoke: blue on black

After I made my new macro photo box, I started thinking about projects that it would work well for. I’ve done some water photos before (though none that I really loved), but what captured my imagination this week was the idea of photographing smoke.

I set up the macro box, put my Vivitar 283 flash on a boom stand, set my camera up on the tripod, and got out a stick of incense. After taking a few shots, I soon realized that the pure white background of the macro box was not working at all – the smoke just didn’t show up against the white at all. I then tried a black background – here’s an example:

smoke photo (attempt 1 example)

After not much success with that, I decided to see how others had approached this subject matter, and found an excellent article on the subject:

http://www.sensitivelight.com/smoke2/

I realized that I was letting far too much light from my flash onto the black background, and as a result it was washing it out. I adjusted the box so the flash was completely flagged off from the background. Here’s what it looks like (the lighter is there so I could focus on it – autofocus is useless with smoke, so I used it to set focus, then shifted over slightly so it was out of the frame).

smoke photos: setup (detail)

Once I popped a test shot, my jaw dropped.

smoke: blue on black

I shot a number of smoke pictures, and with only a little cleanup in Photoshop, I was completely happy with the results.

View the complete set of smoke photos via Flickr.

Part 2: collapsible DIY softbox for Vivitar 283 flash

I also started thinking about my softbox situation. I made a small DIY softbox for the Vivitar 283 a while back, but it had two distinct disadvantages: it wasn’t very easy to stick in a bag, and the front diffuser material was tissue paper, which is quite delicate. I therefore decided to solve both of those problems with a new, slightly larger softbox that would fold up for transport.

As a technology teacher, I made myself sit down and think about this as a design problem, sketching out some requirements and a 3-view drawing.

DIY collapsible softbox

Once my design was set, I got out materials and started construction.

DIY collapsible softbox

It’s not quite done yet, as I have yet to finalize the front diffuser panel, but I have some white shower curtain material that I think is going to work great. Once it’s finished I should be able to use it quite a bit since it will fit in my laptop bag, making it easily portable.

DIY collapsible softbox

View the complete set of DIY softbox photos via Flickr.

5/52: iBook instrument station

This week, I spent some time setting up a new instrument station in the chromedecay studio.

5/52: iBook & Reaktor/Logic instrument station

A few years ago, I replaced my trusty titanium PowerBook with a shiny new Intel MacBook. That brought lots of increased power, but as I mentioned in the post at the time, it meant losing some things I really liked as a result of moving from the PowerPC-based PowerBook to the Intel-based MacBook. My favorite Rhodes electric piano sound came from Logic’s EVP73 plugin, which didn’t run on Intel Macs. One of my other favorite sound sources was Reaktor Session, which I loved for its Vierring ensemble, among others.

logic: evp73 screenshot
reaktor: vierring screenshot

This week’s project, then, was getting an old 500MHz iBook set up to restore that lost functionality! I realized that I could install my old Logic Audio 6 on the iBook and set up EVP73 and Reaktor Session running inside it as AudioUnits plugins. I only get a couple instruments at a time, but that’s perfect – I’m still running Live 7 and Logic 7 on my MacBook Pro, and the audio from the iBook just gets routed straight into that.

Getting Logic installed and set up was a breeze – this is one place where having dongle-based copy protection makes this much easier than a networked challenge/response or authorization. I just plugged in my old Logic dongle, installed the program off CD, and I was up and running. Getting Reaktor Session going was a little more work – it uses a network-based authorization scheme, and I had to email Native Instruments support to get it authorized (to their credit, they turned it around in a day or two and it was quite simple after that).

What I now have is an instrument station that consists of the iBook running Logic 6 with EVP73, Reaktor Session, and any other native Logic instruments I care to load up. It’s got a little 2-in/2-out MIDI interface connected over USB (thanks again, Kent!), which lets me connect my 76-key controller keyboard, as well as MIDI clock sync from the MacBook Pro rig. I can sit down at the keyboard, pull up a great Rhodes sound on the EVP73, and just play. That’s what I was really missing – the chance to just play, without having to worry about routing, plugins, compatibility, and so on.

Here’s a quick jam I recorded last night. The electric piano sound comes from EVP73, the synth sounds are from Reaktor Session’s Vierring ensemble, and the drums are being programmed in Live with a Drum Rack I built.

[audio:https://www.chromedecay.org/wp-content/uploads/2010/01/5_52_-rhodes-+-reaktor-session-jam.mp3|titles=5/52: rhodes + reaktor session jam]
download this audio track: 5/52: rhodes + reaktor session jam

A few detail photos:

5/52: iBook + 76 keys

5/52: iBook snake detail

Finally, if you’re interested, here’s a setup shot, showing how I took the self-portrait that’s at the top of this post:
5/52: setup shot for Bill Van Loo iBook instrument station portrait

The camera for the shot (a Panasonic Lumix DMC-FZ18) is on a microphone boom stand, angled down using a Manfrotto mini ball head. The main light for the portrait is a Vivitar 283 with a 1/2 CTO gel (shown at the right of the photo), also on a microphone boom stand.

Also, you can see that the far end of the studio there is a bit of a mess. That’s another kind of project, though…

4/52 – new Strobist macro lightbox plus DIY photography gear roundup

A few years ago, I saw an article on the excellent Strobist site, describing how you could build a cheap, easy macro studio in a box – the $10 Macro Photo Studio. I went ahead and built one, and it looked like this:

new Strobist $10 macro lightbox

It was quite decent, but unfortunately got destroyed because it was too delicate and I never had a good place to store it (where do you stick a big, delicate box that’s mostly comprised of tissue paper?).

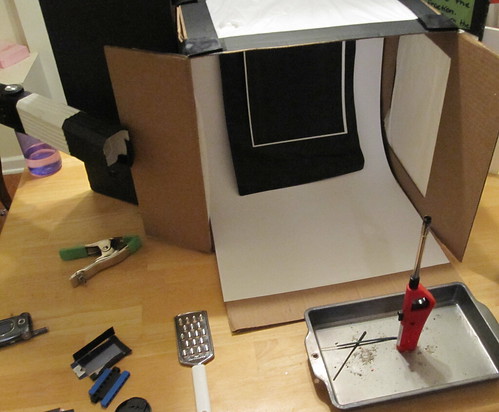
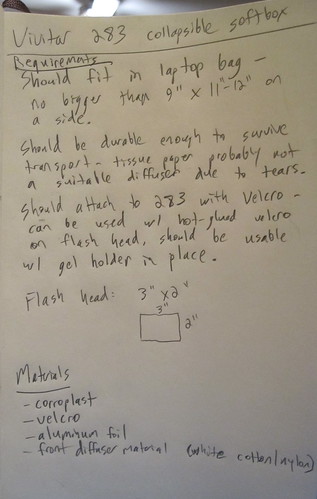
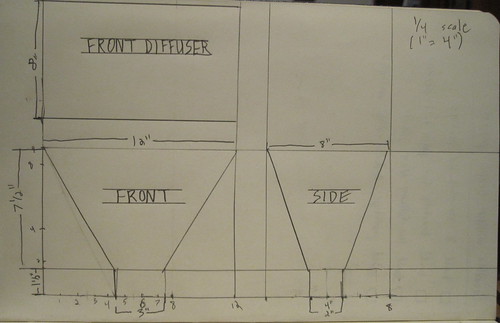
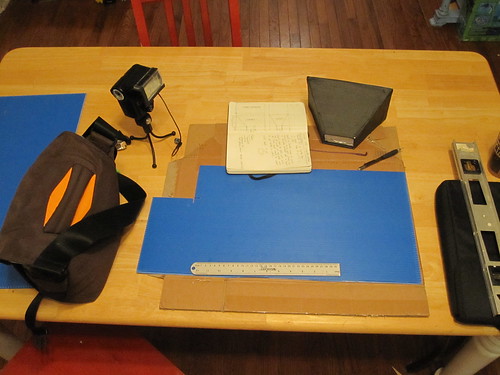
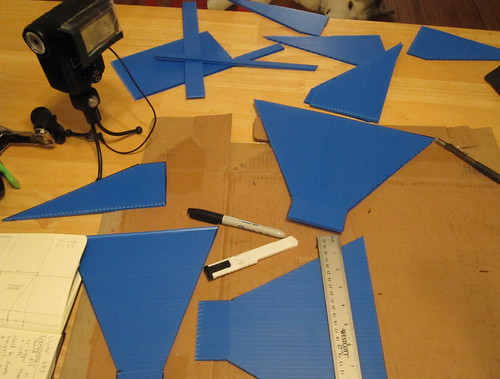
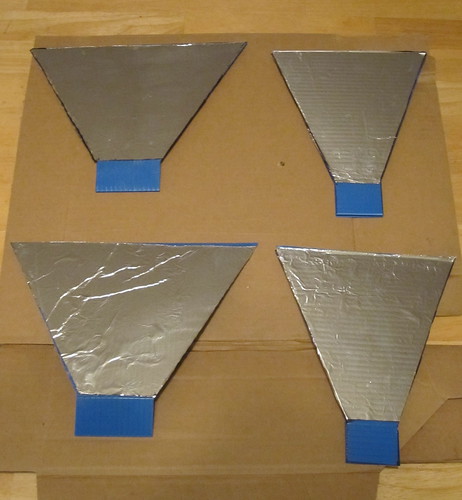
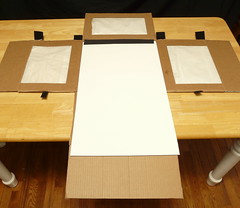
I therefore decided to build a new one for this week’s 52 things entry, making a few modifications along the way. I used the same idea as the original Strobist article, but made a few important changes. First off, I decided it would have to be collapsible, to prevent the issue I’d run into with the first one. As you can see below, this is what it looks like when unfolded:
new Macro lightbox: unfolded

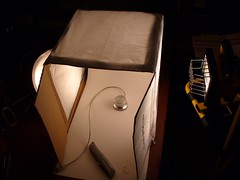
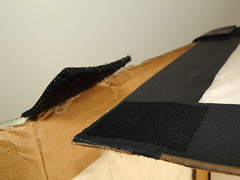
The sides are held together at the top and bottom with Velcro strips that allow it to be quickly assembled or broken down:
new Macro lightbox: corner detail

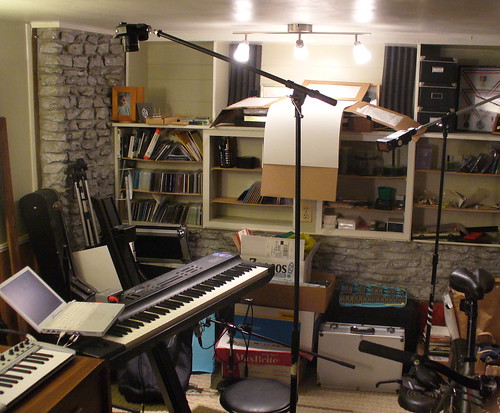
Here’s what it looks like all assembled:
new Macro lightbox: setup shot

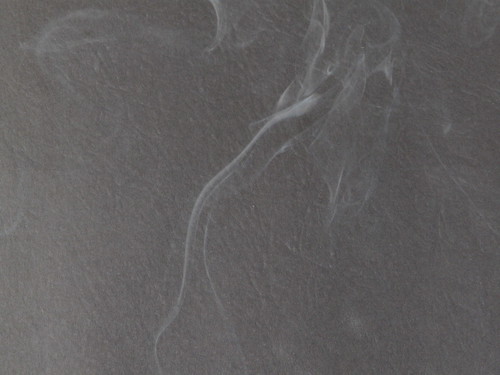
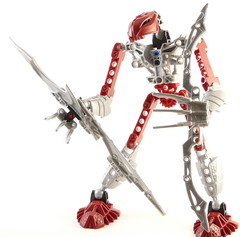
I shot a number of test shots using two flashes: a Sunpak 322s on one side, and a Vivitar 283 on the other side, and got excellent diffused light with minimal shadows, like this one of my son’s Bionicle invention (he’s got a bunch of Bionicles made to his own designs, using parts from the kits he has; check out his own site to see more of what he’s up to):
Macro lightbox test: Bionicle

Unfortunately, the Sunpak died right at the end of my first test session, and I’m not sure why (it seems to get a charge, but the flash never fires). That means I’m down to one flash, the Vivitar 283. It works well enough, though, as you can see from today’s photos.

I decided to use this as a chance to do a roundup of some of the DIY photo gear I’ve made over the past year or two.

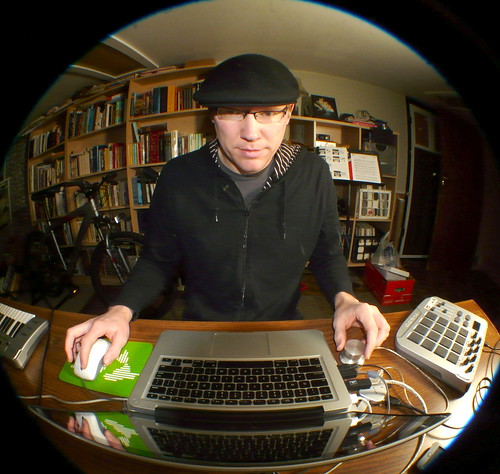
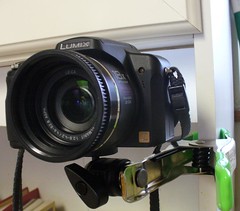
This is a DIY mic stand to tripod stud adapter. I have a number of mic stands in my studio, including a couple boom stands, but only one tripod. That makes it difficult to place my flash, cameras, etc depending on the situation (for my recent chromedecay behind the scenes video, for example, I used an overhead camera shooting down, mounted on a boom stand with this adapter).

Macro lightbox test: DIY microphone stand to tripod stud adapter

It’s just a metal stud that came with my mic stands, drilled out to allow a 1/4 x 20 bolt (the standard for tripod-mounted camera gear) to be passed through. A wing nut and washer allow it to be tightened onto whatever it’s holding.

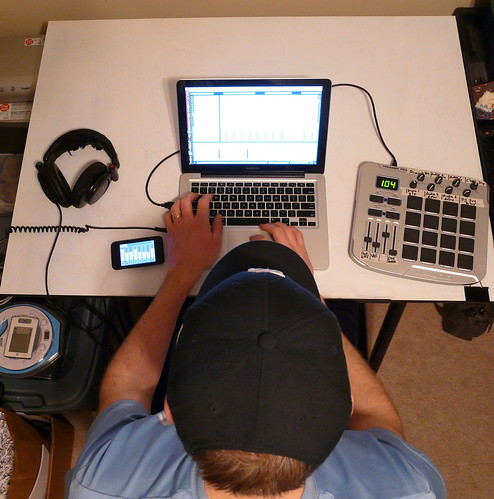
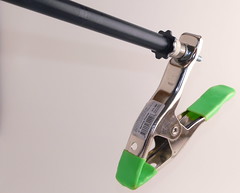
I love these cheap clamps from Home Depot, and when you take the cushion off one of the arms, there’s a perfect spot to pass a 1/4 x 20 bolt through. That means it can be used either as a clamped tripod mount, or as a clamp on the end of a mic stand.

Panasonic Lumix DMC-FZ18 on DIY superclamp

Macro lightbox test: DIY boom clamp

Finally, here’s a homemade diffuser (the “salsa bottle diffuser”) whose origins you can easily guess:
Macro lightbox test: DIY diffuser

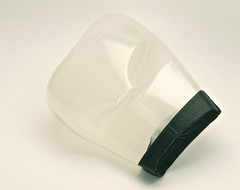
It slips over the end of the Vivitar and diffuses the light nicely.
Check out my Flickr set for more photos of the new Macro lightbox in action, and more DIY photo/video gear.

3/52: behind the scenes video, part 2

I’m pleased to announce that Part 2 of the “chromedecay behind the scenes: bill van loo live performance rig” video is now available on Vimeo. (Part 1 is also available).

chromedecay behind the scenes: bill van loo live performance rig, part 2 from chromedecay on Vimeo.

This 18-minute video shows me demonstrating my live electronic music performance rig. Part 2 covers using Ableton Live with TouchOSC and OSCulator, pad and keyboard controllers, and overall concepts of live performance.

Background information: all this video was shot a few months ago, in a whirlwind evening of setting up cameras, assembling gear, taking test shots, checking lighting levels in my living room, rigging cables, keeping my cats off the table I was using, fighting with my MiniDisc recorder’s microphone, and me waving my hands a lot. This week I finally finished editing it all in Final Cut Express, and I’m now thoroughly sick of the “rendering video” progress indicator. I’m quite pleased with the end result, though!

My friend Kent inquired privately about the technical details from Part 1, so I thought I’d include that here.

TECHNICAL INFORMATION
This video was recorded with 2 cameras; a Panasonic Lumix DMC-FZ18 was used for the head-on shots, and a Canon Powershot SD1000 was used for the overhead shots. All video was recorded in SD 640×480 format due to the cameras used. Editing was performed with Final Cut Express.

Screen captures were done with iShowUHD screen recording software for the Mac.

Voiceovers were recorded with a Rode NT1 into Logic Express 7, then exported for inclusion into the project. External audio was captured onto minidisc, then imported into Logic Express, edited, and exported & synced in Final Cut Express.

2/52: behind the scenes video, part 1

One thing I’ve learned about myself over the years is that I love teaching and sharing knowledge. This led directly into my chosen profession as a technology educator, and also shows itself in other ways, including making demonstration videos.

I’m really pleased to be able to offer this week’s 52 things project: Part 1 of a 2-part series describing and demonstrating my live electronic music performance rig. Part 2 will be posted as next week’s update.

chromedecay behind the scenes: bill van loo live performance rig, part 1 from chromedecay on Vimeo.

Other work from this week

In addition to making this video available, I’ve also been busy taking photographs this past week. On Monday night, I did a quick session in the chromedecay studio, shooting self-portraits so I’d have a new profile picture for Facebook and other social media sites.

Here’s the self-portrait I ended up deciding upon:
Bill Van Loo profile picture

This was shot with a Panasonic Lumix DMC-FZ18, with an external SunPak flash triggered by optical digital slave. I’ll write more about this setup at a later time. Upon reflection (no pun intended), I’d probably add a reflector on the right to fill in some of the shadows on the right side of my face, but I’m well enough pleased for now.

Here’s another shot I liked from that session. It’s cropped to a ultra-widescreen aspect ratio to get rid of the glare from a poster that’s directly above me; light was bouncing back off the acrylic from the poster frame, due to the flash pointing at it, so I cropped it out and got this:
Bill Van Loo in the chromedecay studio - January 2010

I also took advantage of the winter weather to shoot some outdoor photos. Here are a couple of favorites; these are both long exposures taken at night.
50 second trees Huron River long exposure

1/52: welcome to a year of 52 things

I’ve decided to engage in a new project for 2010, called “52 things”. Every week for the entire year, I will be uploading some new thing to the chromedecay site, for a total of 52 projects. This project was inspired by a number of similar “thing a day” or “thing a week” projects, especially the excellent Dust Breeding project run by Marcus Fischer (who has been mentioned here before).

These projects will range from photography to music to code to videos and even physical objects. Each week, I’ll upload the entry and include some notes about the project and the process behind it.

This first week’s project is this site itself. For the past 5 years or more, chromedecay has run as a mixture of blogging software, custom PHP code, and HTML. Today, all that is changing. For the past few months, I’ve been slowly working on getting the latest WordPress installed, migrating the site’s content, configuring plugins, and other such things.

The chromedecay site is now fully powered by the latest version of WordPress, and all content now exists as Pages inside WordPress. While that might not mean a lot to you, for me it means the ability to add to and change the site more easily, as well as opening it up to more collaboration with people like Joshua Schnable, who has his own set of projects that he’s eager to start adding to the chromedecay site.

One added bonus: the first seven chromedecay digital downloads are now available again! Over the years, the links to those releases got broken since they weren’t originally hosted on the chromedecay server, making them unavailable. However, today they’re available again, and it’s like rediscovering an old friend. I had a blast listening to some of the old live sets, especially, and I hope you do, too.

Over the coming weeks and months, the site will be continue to change – the current site design is fairly spartan, focused more on getting the new content and WordPress installation running. There are probably still some small wrinkles left to be ironed out, too – I’ll be watching for that as time goes by.

Here’s to a year of 52 things!